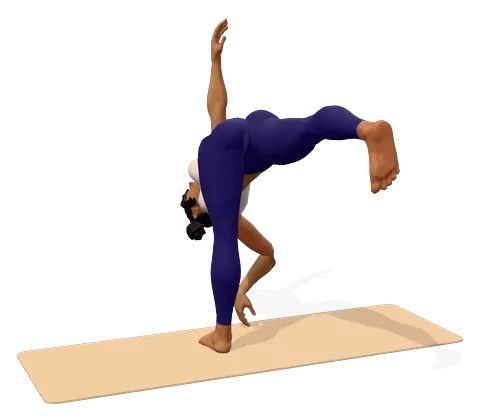
How to do Revolved Half Moon Pose step by step
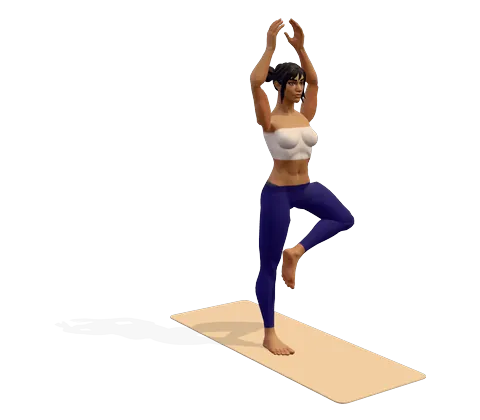
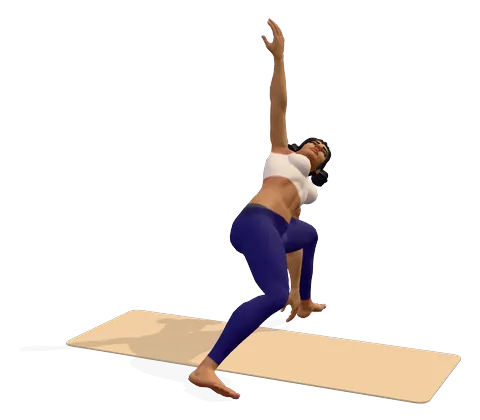
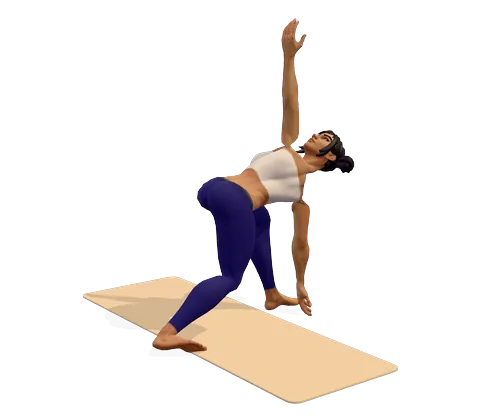
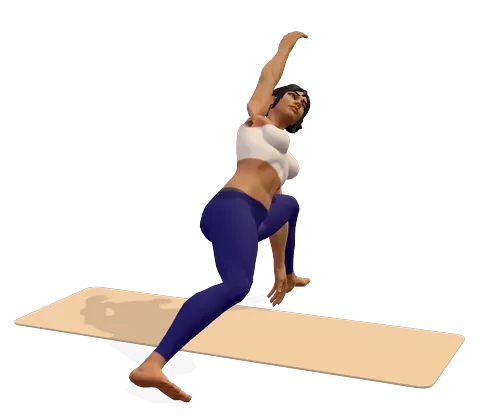
- Start in Pyramid pose or a short lunge with your left foot forward. Place your right fingertips or a block on the floor about 30 cm in front of your left foot, slightly to its inner side.
- Rest your left hand on your left hip. Shift your weight onto your left foot and bend the left knee a little.
- Breathing in, lift your right leg back until it is level with your hip, and straighten your left leg. Toes of the lifted foot point down to the floor.
- Square your hips to the floor: draw the left hip back and press the right heel away. Lengthen your spine from the tailbone to the crown.
- Breathing out, turn your chest to the left, then reach your left arm straight up. Look at the floor first, then toward your left hand if you are steady.
- Hold for 15–20 seconds (3–4 breaths), keeping both hips level.
- To come out, look down, bring the left hand to the floor, bend the left knee and lower your right foot back. Stand up slowly, then repeat on the right side.
Where you feel Revolved Half Moon Pose: what it stretches and strengthens
Keep your hips level and turn your chest open over the standing leg. In the 3D guide, turn on Body guide: areas that stretch glow green and areas that work glow saffron.
Stretches
- Hamstrings
- Upper back
- Side waist
Strengthens
- Glutes
- Ankles
- Abs
Benefits and precautions
Benefits
- Builds single-leg balance, ankle strength and body awareness
- Strengthens the glutes, hips and deep abdominal muscles
- Stretches the hamstrings of the standing leg
- Mobilises the upper back and ribs through rotation
- Stretches and works the oblique muscles at the waist
- Demands full focus, which many people find calming
Avoid or modify if
- Pregnancy — avoid it; the deep twist and the fall risk are not suitable
- Recent disc injury, back surgery, SI joint pain or spinal fracture — avoid it unless your physiotherapist approves
- Low blood pressure, vertigo or poor balance — avoid it, or practise the wall version with a block and look down
- Injury to the standing ankle, knee or hip, or a torn hamstring — skip it until fully healed
- Osteoporosis or a hernia — avoid loaded deep twists; ask your doctor or physiotherapist
- Neck pain — keep your gaze on the floor instead of turning your head up
Revolved half moon pose (Parivrtta Ardha Chandrasana) is an advanced standing balance that combines three hard things in one shape: standing on one straight leg, holding the body level with the floor and twisting the spine. The hand opposite to the standing leg rests on the floor, the other arm reaches up, and the lifted leg stays parallel to the floor. This guide covers what you should be able to do first, how to do revolved half moon pose step by step, cues, variations and who should not try it.
What is revolved half moon pose?
It is the twisted version of half moon pose (Ardha Chandrasana). In the open half moon your hips stack on top of each other and your chest faces forward. In the revolved form your hips face the floor, like in Warrior III, and only the upper body turns. Other names you may hear are twisted half moon pose, rotated half moon pose and reverse half moon pose. Among all the yoga poses half moon variations, this is the hardest balancing one: yoga with a twist, on a single foot.
Revolved half moon pose in Sanskrit
The Sanskrit name has four parts: parivrtta means "revolved" or "turned around", ardha means "half", chandra means "moon" and asana means "pose". So Parivrtta Ardha Chandrasana simply means "revolved half moon posture".
Before you start: prerequisites
This is a level-three pose. Do not attempt it until you can hold the open half moon for 30 seconds on each side, hold Warrior III for about 20 seconds with level hips, and twist comfortably in revolved triangle. If any of these still wobble, work on them first.
You also need hamstrings long enough to hinge forward with a flat back and a pain-free lower back. If your back or standing knee hurts in any of the prep poses, stop and ask a physiotherapist before going further.
How to get into revolved half moon
The steps above follow the 3D guide, left leg standing first. The key idea: build the balance first, then add the twist. Many people twist too early, the hips tip open and the pose becomes a shaky half twist. Get the hips square and the leg level, and only then turn the chest.
Revolved half moon yoga pose cues
- Hand under the shoulder. Place it in front of the standing foot and slightly to its inner side; a block brings the floor closer.
- Toes of the lifted foot point down. This keeps the back hip from rolling open. If you see the side of your foot, turn it down.
- Standing hip back, lifted heel away. This levels the pelvis.
- Twist from the ribs, not the hips. The belly and hips face the floor; the chest turns.
- Gaze last. Look at the floor until you are steady, then turn your head.
These tips for half moon pose apply to both versions: a soft standing knee, the whole foot pressing down and slow breathing.
Revolved half moon pose benefits
The benefits come from the mix of balance, strength and rotation. The standing leg, ankle and glutes work hard to hold you up, and the hamstrings of that leg are stretched. The deep abdominal muscles and obliques work to control the twist, and the upper back and ribs rotate, which many people find good after long hours sitting. Because revolved half moon pose yoga practice is so demanding, it also trains concentration.
Most general half moon yoga pose benefits apply here too, such as better balance and stronger hips, just as in the balancing half moon pose without a twist. The twist adds more work for the upper back and waist, and more challenge for balance.
Revolved half moon pose muscles
| Stretched | Strengthened |
|---|---|
| Hamstrings of the standing leg | Glutes of both legs |
| Upper back, between the shoulder blades | Ankle and foot of the standing leg |
| Obliques and the sides of the ribs | Abdominal muscles, holding the twist |
Revolved half moon pose variations
How to do revolved half moon pose at the wall
What is revolved half moon pose at the wall? It is the safest way to learn it. Stand facing away from a wall, about one leg-length from it, and press the sole of the lifted foot into the wall at hip height. The wall holds the leg, so you can focus on the twist. It is the best choice for revolved half moon pose for beginners who already meet the prerequisites.
- Half moon yoga block: a block under the lower hand, on its tallest height, keeps the spine long.
- Top hand on the hip: twist with the hand on the hip before reaching the arm up.
- Revolved bound half moon pose: for experienced students, the top arm wraps behind the back.
- Revolved half moon bow pose: the lifted knee bends and the top hand holds the foot, adding a backbend. Very advanced.
Revolved half moon pose sequence
Prep poses and warm up poses for half moon
Good revolved half moon prep poses: Pyramid pose for the hamstrings, revolved triangle and revolved side angle pose for the twist, and Warrior III for the balance. A revolved half moon peak pose sequence often runs: Mountain pose (the benefits of Mountain pose include a steady, even stance to build from), Pyramid, revolved triangle, Warrior III, then revolved half moon. You can build this revolved half moon yoga sequence in the sequence builder.
Revolved half moon counter pose
After the pose, fold into a relaxed standing forward bend with bent knees, then rest in Child's pose. A gentle lying twist also works at the end of practice.
Revolved half moon pose contraindications
Revolved half moon pose is not for everyone. Avoid it during pregnancy, with a recent back injury or surgery, SI joint pain, vertigo or low blood pressure, a hernia or osteoporosis, or any injury to the standing leg. If you feel pain in the lower back, knee or hip, or dizziness, come out slowly and rest. When in doubt, choose the open half moon or revolved triangle with a block, and practise balance in our guided Balance and Focus session.
Frequently asked questions
How do I get into revolved half moon pose?
From Pyramid pose, place the opposite hand on the floor or a block in front of the standing foot, lift the back leg to hip height with the toes pointing down, square the hips, then turn the chest and reach the top arm up.
Is revolved half moon pose good for beginners?
No. It is an advanced pose. Beginners should first learn the open half moon, Warrior III and revolved triangle, then try the wall version.
What is the difference between half moon and revolved half moon?
In half moon the hips stack and the chest faces forward, using the hand on the same side as the standing leg. In revolved half moon the hips face the floor, the opposite hand comes down and the chest twists.
How long should I hold revolved half moon pose?
Start with 15–20 seconds (3–4 breaths) on each side. Quality matters more than time.
Why do my hips tip open in revolved half moon?
The lifted foot has probably turned out. Point the toes to the floor, draw the standing hip back and twist from the ribs.
Who should not do revolved half moon pose?
Avoid it in pregnancy, with a recent back or disc injury, SI joint pain, vertigo, low blood pressure, a hernia, osteoporosis or an injury to the standing leg.
This page is for general education. Check with your doctor before starting yoga if you are pregnant, have a medical condition or an injury. Stop if you feel pain, dizziness or shortness of breath.