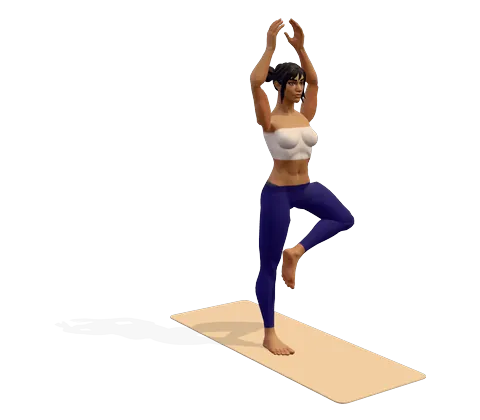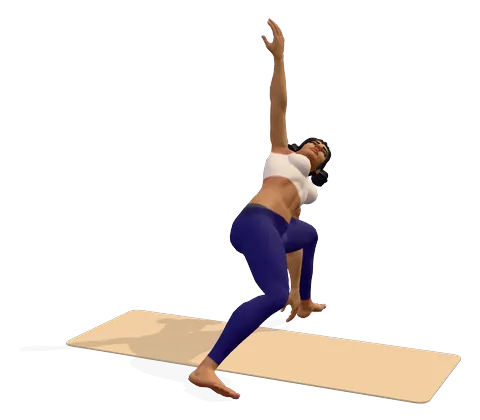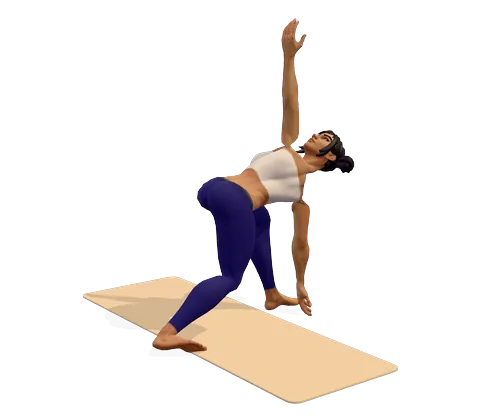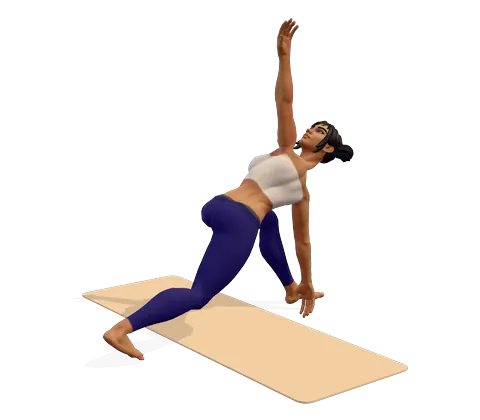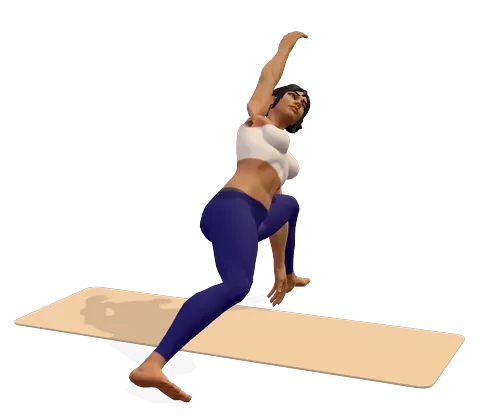
How to do Extended Side Angle Pose step by step
- Stand with your feet wide apart, about 1.2 metres, and raise your arms out to shoulder height.
- Turn your left foot out 90 degrees and your right foot in slightly. Line up your left heel with the arch of your right foot.
- Breathing out, bend your left knee until it is over your left ankle, with the thigh moving toward parallel to the floor. Keep the knee pointing toward your little toe, not collapsing inward.
- Lower your left forearm onto your left thigh, or place your left hand on a block or the floor by the outside of your left foot.
- Breathing in, sweep your right arm over your right ear so it makes one straight line with your right leg. Press the outer edge of the right foot into the floor.
- Turn your chest toward the side of the room and look up past your right arm, or straight ahead. Hold for 20–30 seconds (3–6 breaths).
- To come out, press through both feet, reach your right arm up and straighten your left leg as you breathe in. Turn the feet and repeat on the right side.
Where you feel Extended Side Angle Pose: what it stretches and strengthens
Feel one long line from your back heel to your fingertips. In the 3D guide, turn on Body guide: areas that stretch glow green and areas that work glow saffron.
Stretches
- Side waist
- Inner thighs
- Shoulders
Strengthens
- Front thighs
- Glutes
Benefits and precautions
Benefits
- Strengthens the thighs, glutes, knees and ankles
- Stretches the groin, inner thighs and the whole side of the body from ankle to fingertips
- Opens the hips and chest and improves shoulder mobility
- Builds stamina and heat as a strong standing pose
- Encourages fuller breathing into the side ribs
- Prepares the body for binds, twists and standing balances
Avoid or modify if
- Knee injury or knee pain — bend the front knee less and never let it go past the ankle or fall inward
- Hip or groin injury — shorten the stance and use the forearm-on-thigh version
- Shoulder injury — keep the top hand on your hip instead of reaching over your ear
- Neck problems — keep your gaze forward or down rather than turning to look up
- High or low blood pressure, or dizziness — keep the top hand on the hip, look down and come up slowly
- Pregnancy — use the forearm on the thigh, a shorter stance and a wall behind you; ask your midwife or doctor first
Extended side angle pose (Utthita Parsvakonasana) is a standing pose where you bend deeply into the front knee, lower one hand toward the floor and stretch the other arm over your ear, so your body makes one long diagonal line from the back foot to the top hand. It is stronger than triangle, working the legs hard while it opens the hips and the whole side of the body. Below: how to do it, benefits, muscles worked, variations and precautions.
What is extended side angle pose?
The Utthita Parsvakonasana meaning is easy to unpack: utthita means "extended", parsva means "side", kona means "angle" and asana means "pose". So what does Utthita Parsvakonasana translate to in English? "Extended side angle pose". Utthita Parsvakonasana in Hindi is उत्थित पार्श्वकोणासन, and the pronunciation is roughly "oot-THI-tah parsh-vah-koh-NAHS-uh-nuh".
Side angle vs extended side angle
Many teachers use "side angle pose" (Parsvakonasana) for the easier version, with the forearm resting on the thigh, and save "extended side angle pose" for the full version, with the hand down by the foot and the top arm reaching over the ear. Others use the names interchangeably. In both, the legs do the same work; the difference is how far the torso reaches.
How to do extended side angle pose
The steps above show the left side first, as the 3D guide does. These extended side angle pose cues fix the common mistakes:
- Knee over ankle. The front shin should be roughly vertical. If the knee drifts past the ankle, widen your stance.
- Knee toward the little toe. Gently press the front knee outward so it does not fall toward the big toe.
- Do not sink into the arm. Whether your forearm is on your thigh or your hand is on the floor, keep it light. The legs and core should hold you, not the arm.
- One long line. From the outer edge of the back foot to the top fingertips should be a straight diagonal. If the top arm drops forward, bring it back beside the ear.
- Chest open. Roll the top shoulder back so the chest turns toward the side of the room, rather than toward the floor.
- Back foot anchored. Press the outer edge of the back foot down; if it lifts, the stance is too long.
Extended side angle pose benefits
The main benefit of extended side angle pose is strength with length. The front thigh works close to parallel to the floor, which builds leg and hip strength, while the back leg, waist and top arm get a long stretch. That combination makes it a good pose for anyone who sits for many hours with tight hips and stiff sides.
It also opens the groin and inner thighs, so it appears in sequences for tight hips. Reaching over the ear stretches the side ribs, which can make breathing feel freer, and the effort builds heat and stamina.
Extended side angle pose muscles worked
| Strengthens | Stretches |
|---|---|
| Quadriceps and glutes of the front leg | Inner thigh and groin of both legs |
| Back leg muscles and the arch of the back foot | Calf and hamstrings of the back leg |
| Obliques and deep core | Side of the waist and the muscles between the ribs |
| Shoulders, holding the top arm in line | Latissimus dorsi (the broad back muscle) and chest |
Extended side angle pose variations and modifications
- Forearm on the thigh: the easiest version and the best extended side angle pose for beginners. It keeps the spine long and the chest open.
- Extended side angle pose with a block: place a block outside or inside the front foot to reach the "floor" without collapsing.
- Top hand on the hip: for sore shoulders, high blood pressure or when the arm tires.
- Bound side angle: wrap the top arm behind the back and the lower arm under the front thigh to clasp hands or a strap. Bound side angle pose benefits are a deeper shoulder and chest opening; try it only when the full pose is comfortable.
- Chair version: in chair yoga, extended side angle pose is done sitting sideways with the front thigh on the seat and the other leg stretched back. It suits seniors and anyone with limited balance.
- Against a wall: press the back heel into a wall for extra stability.
Extended side angle vs triangle pose
What is the difference between extended side angle and triangle pose? In triangle both legs are straight and the top arm reaches up to the ceiling; it is mainly a hamstring and side stretch. In extended side angle the front knee bends to about 90 degrees and the top arm reaches over the ear; it is much stronger for the legs and gives a longer side stretch. Many flows move from extended side angle pose to triangle pose simply by straightening the front leg.
Utthita Parsvakonasana vs Parivrtta Parsvakonasana: the twisted cousin, revolved side angle pose (also called revolved extended side angle pose), hooks the opposite elbow outside the front knee. It is harder and not suitable in pregnancy.
Prep poses, sequence and counter pose
Good extended side angle prep poses are Warrior II, which uses the same leg position, a low lunge and a gentle side bend. A simple flow: Warrior II, Reverse Warrior, extended side angle, then straighten into triangle. For a counter pose, fold into a wide-legged forward bend to rest the legs and let the spine hang.
Is extended side angle a peak pose? Usually not. It is a foundation pose that builds toward binds, balances and twists, though in a beginners' class the bound version can be the highlight. You can practise these standing poses with voice guidance in our guided sessions.
Extended side angle pose contraindications and precautions
Most people can do some version of this pose. With knee, hip, shoulder or neck problems, change it as the caution list shows: bend less, use the forearm on the thigh, keep the top hand on the hip and look down. If you have high or low blood pressure, avoid long holds with the arm overhead and come up slowly. During pregnancy, use a shorter stance, the forearm version and a wall for support, and check with your midwife or doctor.
उत्थित पार्श्वकोणासन (Utthita Parsvakonasana) — हिंदी में: पैरों को चौड़ा फैलाएँ और बायाँ पंजा बाईं ओर मोड़ें। बायाँ घुटना टखने के ठीक ऊपर तक मोड़ें और बायाँ हाथ पैर के पास ज़मीन या ब्लॉक पर रखें (या कोहनी जाँघ पर)। दायाँ हाथ कान के ऊपर से सीधा आगे की ओर फैलाएँ और 20–30 सेकंड रुकें, फिर दूसरी तरफ़ करें। फायदे: जाँघें और कूल्हे मज़बूत होते हैं, कमर के किनारे और जाँघों के अंदर खिंचाव आता है। घुटने या कंधे में दर्द हो तो हल्का रूप करें (कोहनी जाँघ पर)।
Frequently asked questions
What is extended side angle pose?
Extended side angle pose (Utthita Parsvakonasana) is a standing pose with a deep bend in the front knee, one hand or forearm lowered toward the front leg and the other arm stretched over the ear in one diagonal line with the back leg.
What are the benefits of Utthita Parsvakonasana?
It strengthens the thighs, glutes and ankles, stretches the groin, inner thighs and side of the body, opens the hips and chest and builds stamina.
Should my hand go inside or outside the front foot?
Outside is the classic version and opens the chest more. Inside can be easier on the shoulder. Use a block, or the forearm on the thigh, if the floor is too far away.
What is the difference between side angle and extended side angle?
Many teachers call the forearm-on-thigh version side angle and the hand-to-floor version extended side angle. The leg position is the same.
How long should I hold extended side angle?
Hold for 20–30 seconds (3–6 breaths) per side. Build up to a minute once your legs are strong enough to hold the knee over the ankle.
Why do I feel extended side angle in my knee?
Usually the knee is past the ankle or falling inward. Widen the stance, keep the shin vertical and point the knee toward the little toe. Stop if the pain continues.
Is extended side angle pose safe in pregnancy?
Many people can practise a modified version with the forearm on the thigh and a shorter stance, near a wall. Ask your midwife or doctor first, and avoid the revolved version.
This page is for general education. Check with your doctor before starting yoga if you are pregnant, have a medical condition or an injury. Stop if you feel pain, dizziness or shortness of breath.