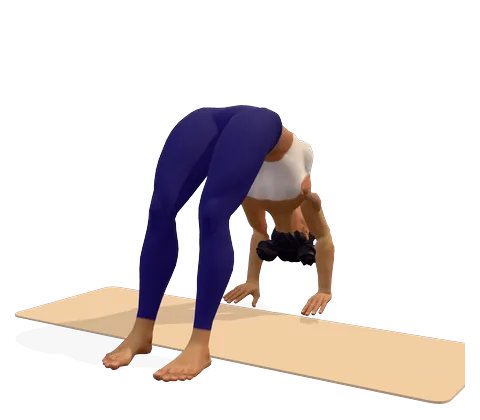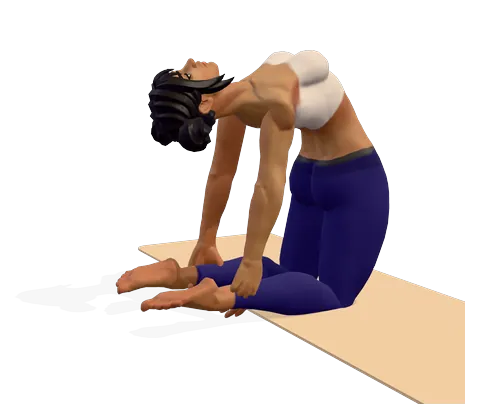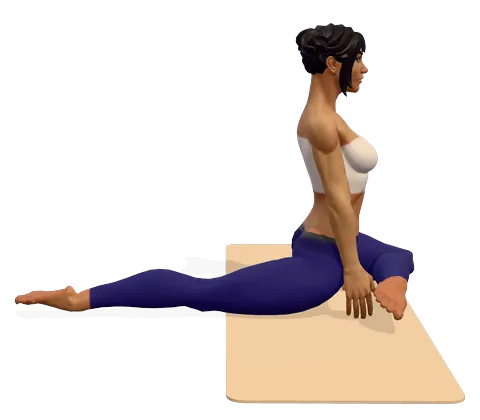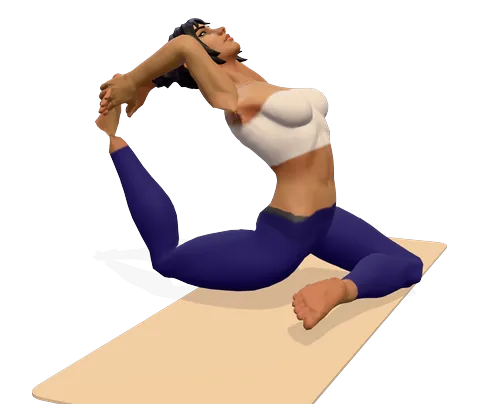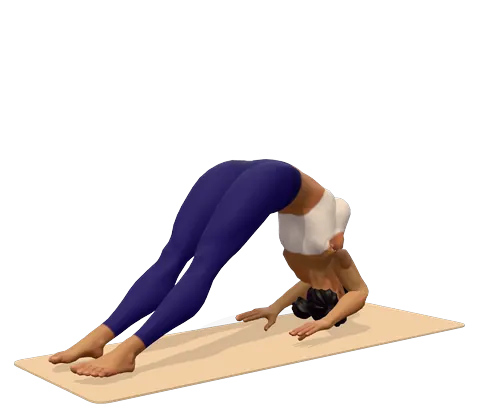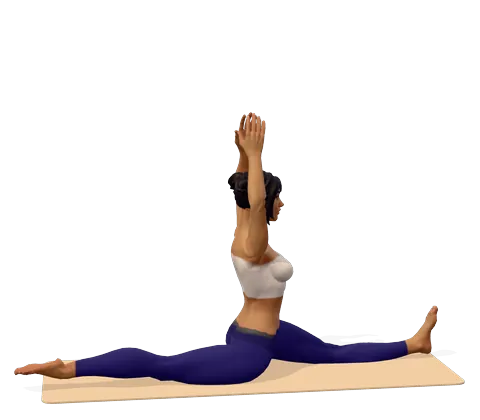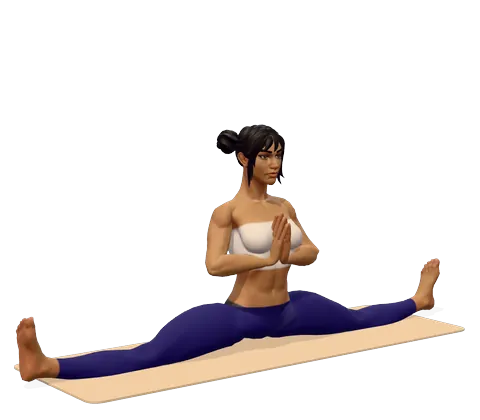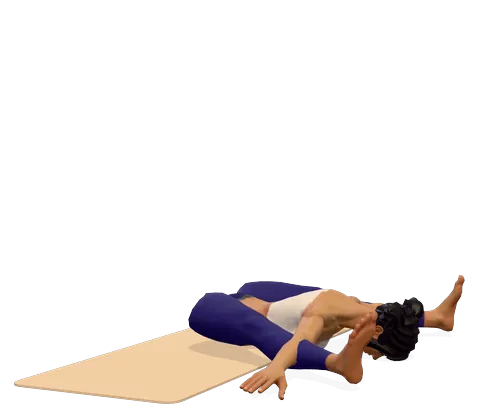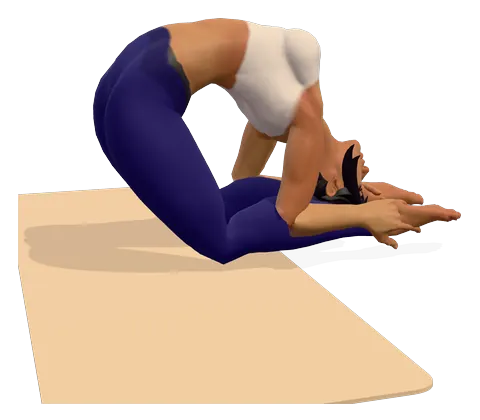
How to do Kneeling Pigeon Backbend step by step
- Warm up fully with backbends and hip-flexor stretches. Kneel with your knees hip-width apart, thighs upright, tops of the feet on the mat.
- Place your hands on your lower back or bring them together at the chest. Breathe in, lift your chest high and press your hips forward.
- Breathe out and arch back, reaching your arms overhead and back toward the floor behind you, hips staying over the knees.
- Place your hands on the floor behind you and walk them toward your feet, fingers pointing toward your toes.
- Hold your heels. Lower your elbows and forearms to the floor and rest the top of your head on the mat near your feet.
- Stay for 3–5 breaths (about 15 seconds). Keep pressing the hips forward and breathing into the chest.
- To come up, place your hands flat, press into them to lift your head, then use your thigh strength to rise slowly to kneeling. Rest in child's pose.
Where you feel Kneeling Pigeon Backbend: what it stretches and strengthens
Walk your hands to your heels and rest your forearms and head down. In the 3D guide, turn on Body guide: areas that stretch glow green and areas that work glow saffron.
Stretches
- Chest
- Hip flexors
- Front thighs
- Shoulders
Strengthens
- Lower back
- Glutes
Benefits and precautions
Benefits
- Gives one of the deepest stretches in yoga to the chest, shoulders, hip flexors and thighs
- Strengthens the back muscles, glutes and thighs that control the backbend
- Opens the shoulders fully overhead
- Opens the rib cage, which can make the breath feel fuller
- Trains calm breathing and focus in a demanding shape
Avoid or modify if
- Very advanced — only after a comfortable camel pose and wheel pose with straight arms; not for beginners
- Back injury, spondylolisthesis, disc problems or neck problems — avoid
- High or low blood pressure, heart disease, glaucoma, migraine or dizziness — avoid; the head goes below the heart
- Pregnancy — avoid
- Knee or shoulder injury — avoid
- Stop at any sharp pain, numbness or pinching in the lower back; never let anyone pull your hands to your heels
Kapotasana (kneeling pigeon backbend) is one of the deepest backbends in yoga. From kneeling, you arch back until your hands hold your heels, your forearms rest on the floor and the top of your head comes down near your feet. It needs open shoulders, long hip flexors and a strong, supple spine, and it usually takes years to learn. This page explains the name, how it differs from the more familiar pigeon pose, the prerequisites, the steps and who should avoid it.
What is Kapotasana?
In Sanskrit, kapota means "pigeon" and asana means "pose". Why is it called pigeon pose? In the full backbend the chest swells forward and up, like a pigeon puffing out its chest, and that is also why the hip-opening pigeon pose is called that: its lifted chest has the same proud shape. Kapotasana yoga is best known as a peak pose of the Ashtanga intermediate series, and some teachers call it the full pigeon pose or even full king pigeon pose.
What is a pigeon pose in yoga? Several poses share the name
When most people ask "what is the pigeon pose", they mean a hip opener, not this backbend. Here is how the pigeon yoga pose family fits together:
| Pose | What it is | Level |
|---|---|---|
| Half pigeon / one-legged pigeon | Front shin across the mat, back leg straight; a hip stretch. Folding forward gives the sleeping pigeon yoga pose. | Beginner–intermediate |
| Reclining pigeon | The same hip stretch lying on your back, also called upside down pigeon pose or eye of the needle | Beginner |
| One-legged king pigeon pose (yoga name Raja Kapotasana) | Half pigeon plus a backbend, hands holding the back foot | Advanced |
| Kapotasana (this page) | Kneeling backbend, head to the feet, hands on the heels | Very advanced |
| Flying pigeon | An arm balance with one shin on the upper arms | Advanced |
So when comparing full pigeon pose vs half pigeon pose, the difference is huge: half pigeon is a hip stretch most people can learn, while full pigeon (Kapotasana) is an advanced backbend. Other pigeon yoga pose variations, such as reverse, double and twisted pigeon, are also hip openers. If you came here for pigeon pose for beginners, lower back pain or sciatica, the half pigeon page, or the reclining version, is where you want to be. That half pigeon pose yoga page explains how to do pigeon pose correctly as a hip stretch. The reclining version is the kindest yoga pigeon pose for beginners and a common pigeon pose stretch for beginners in physical therapy. In chair yoga, pigeon pose is done seated with one ankle resting on the other knee; this seated pigeon pose stretch (sitting pigeon pose for sciatica is a common search) is easy to do at a desk. Physiotherapists sometimes teach pigeon pose on a table or bed edge for the same reason. Flying pigeon pose in yoga is an arm balance and has nothing to do with this backbend.
Raja Kapotasana benefits are close to those of Kapotasana, plus a strong hip stretch, because it combines half pigeon with a backbend.
Kapotasana prerequisites: preparing for full pigeon pose
Preparing for pigeon pose in its full form takes time. Do not try Kapotasana until you can do these comfortably and without pain:
- Camel pose with both hands on the heels, hips over the knees and the chest open for five breaths.
- Wheel pose with straight arms, and lowering down with control.
- Laghu Vajrasana, the smaller kneeling backbend that holds the knees.
- Arms fully overhead with straight elbows and no arching of the lower back, a sign of open shoulders.
- A deep hip-flexor stretch such as low lunge with the hips sinking easily.
Kapotasana puts large forces through the lower back, neck and shoulders. If the bend happens mostly in your lower back, or you feel pinching or nerve-like pain, stop and keep working on the preparation poses.
How to do Kapotasana (Kapotasana kaise kare)
The steps above match the 3D guide. This is how to cue pigeon pose in its full backbend form, and what proper pigeon pose form looks like here:
- Hips forward, always. The thighs stay nearly upright. If the hips move back, the whole weight lands on the lower back.
- Lift, then arch. Lift the chest up before going back, so the upper back bends as much as the lower back.
- Elbows shoulder-width. Keep the forearms parallel so the shoulders stay stable.
- Head light. The top of the head only touches the floor; your forearms and legs take the weight.
- Breathe. The belly is stretched, so the breath is short. Keep it smooth and never hold it.
Earlier stages and modifications for pigeon pose in its full form
Most people practise stages for a long time: hands on the floor behind with the head lifted, then hands on blocks, then fingertips to the toes. Doing the backbend against a wall helps too. Any of these gives most of the stretch with far less load.
Kapotasana benefits and muscles stretched
For those who are ready, the benefits of Kapotasana are mainly physical:
| Stretches | Works |
|---|---|
| Chest and front of the shoulders | Muscles along the lower spine |
| Hip flexors and quadriceps | Glutes |
| Abdomen and front of the neck | Thighs (to control the way down and up) |
Traditional teachers also say that deep backbends are energising and uplifting. There is no research on this pose, so treat these as traditional claims. Press the Body guide button on the 3D demo to see the stretched areas glow green and the working areas glow saffron.
Kapotasana or Laghu Vajrasana?
Both are kneeling backbends that bring the head toward the feet. In Laghu Vajrasana the hands hold the knees and the backbend is smaller; in Kapotasana the hands reach all the way to the heels and the forearms rest down. Laghu Vajrasana comes first and builds the strength of the thighs you need to come out of Kapotasana safely.
Kapotasana contraindications
Read the caution box above. In short, avoid it with any back, neck, knee or shoulder problem, in pregnancy, and with blood pressure problems, heart disease, glaucoma or migraine, because the head goes below the heart. Come up slowly and rest in child's pose afterwards.
कपोतासन (Kapotasana, full pigeon pose in Hindi): यह एक बहुत कठिन आसन है। घुटनों के बल खड़े होकर पीछे की ओर झुकें, हाथों से एड़ियाँ पकड़ें, कोहनियाँ ज़मीन पर रखें और सिर पैरों के पास लाएँ। इससे छाती, कंधे और जाँघों के आगे का हिस्सा पूरी तरह खुलता है। इसे तभी करें जब उष्ट्रासन और चक्रासन आराम से हो जाएँ। कमर, गर्दन या घुटने की समस्या, उच्च या निम्न रक्तचाप, हृदय रोग और गर्भावस्था में यह आसन न करें।
Frequently asked questions
What is Kapotasana?
Kapotasana is a very deep kneeling backbend. You arch back until your hands hold your heels, your forearms rest on the floor and the top of your head comes near your feet.
Is Kapotasana the same as pigeon pose?
No. The common pigeon pose (half or one-legged pigeon) is a hip stretch. Kapotasana, sometimes called full pigeon pose, is an advanced backbend that shares the name kapota, pigeon.
What are the benefits of Kapotasana?
It gives a deep stretch to the chest, shoulders, hip flexors and thighs, strengthens the back and glutes, and trains calm breathing in a demanding shape.
What should I be able to do before Kapotasana?
A comfortable camel pose with hands on the heels, wheel pose with straight arms, Laghu Vajrasana and arms fully overhead without arching the lower back.
What muscles does the pigeon pose stretch?
Pigeon pose stretches different muscles in each version. Half pigeon stretches the outer hip and glutes of the front leg and the hip flexors of the back leg. Kapotasana stretches the chest, shoulders, abdomen, hip flexors and quadriceps.
How long should I hold Kapotasana?
About 15 seconds, or 3–5 breaths, and only after a thorough warm-up. Rest in child's pose afterwards.
Who should not do Kapotasana?
Beginners, and anyone with a back, neck, knee or shoulder injury, high or low blood pressure, heart disease, glaucoma, migraine, or who is pregnant.
This page is for general education. Check with your doctor before starting yoga if you are pregnant, have a medical condition or an injury. Stop if you feel pain, dizziness or shortness of breath.