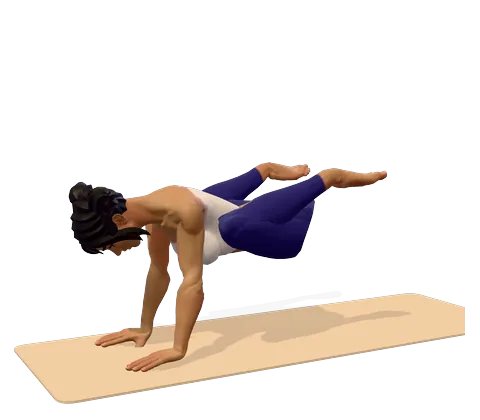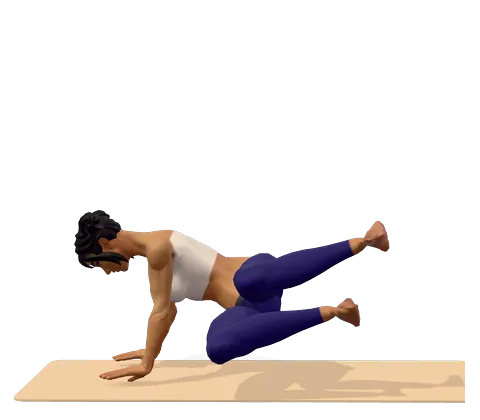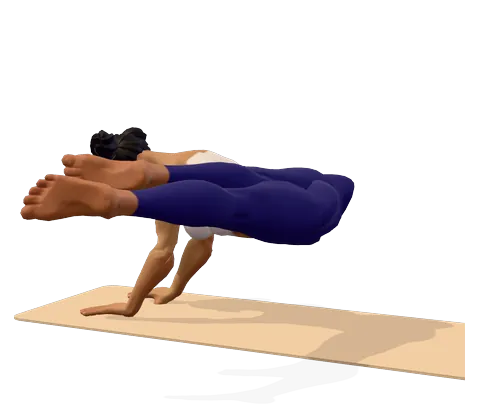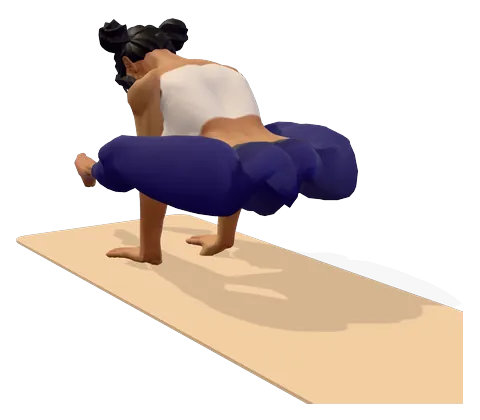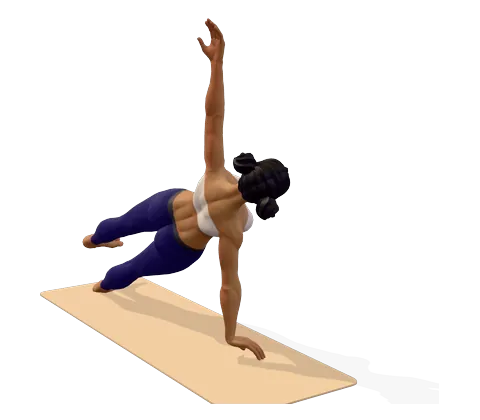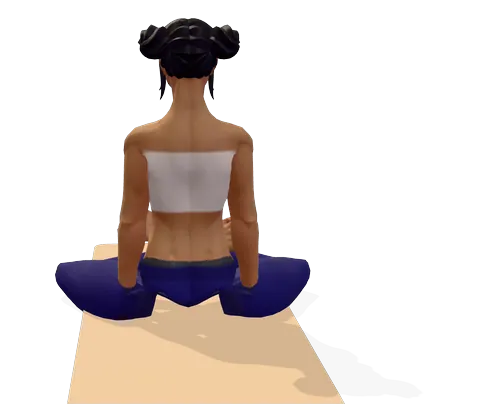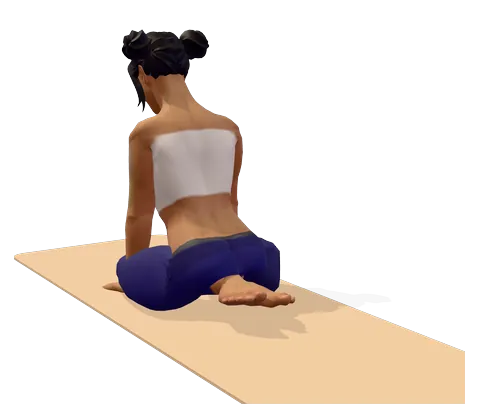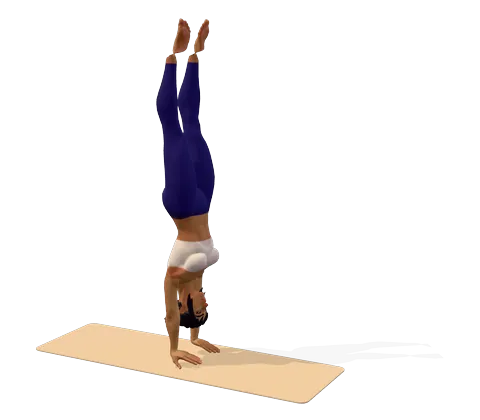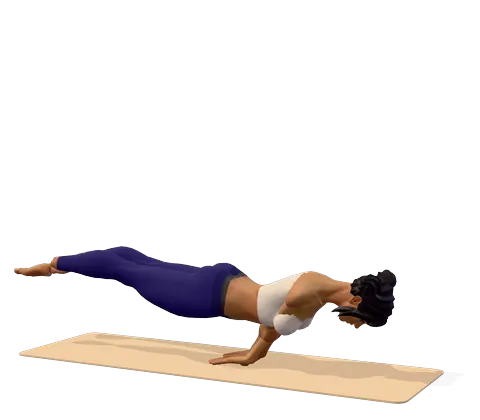
How to do Peacock Pose step by step
- Kneel with your knees apart and sit back toward your heels. Place your palms on the mat between your knees, fingers pointing back toward your feet and little fingers close together.
- Bend your elbows and draw them together. Lean forward so both elbows press into your upper belly, just above the navel.
- Stretch your legs straight back one at a time, toes tucked under and legs together. Your forehead can rest on a cushion while you set up.
- Firm your belly against your elbows, squeeze your legs together and slowly shift your chest forward until your weight moves over your hands.
- When your feet feel light, lift them off the floor so your body forms one straight line from head to heels, level with the floor. Look forward.
- Hold for 2–3 steady breaths (about 10 seconds). Keep breathing — do not hold your breath or strain your face.
- Lower your feet, then your knees. Lift your elbows off your belly and rest in child's pose, then stretch your wrists.
Where you feel Peacock Pose: what it stretches and strengthens
Press your elbows into your belly and lift your legs. In the 3D guide, turn on Body guide: areas that stretch glow green and areas that work glow saffron.
Stretches
- Wrists
Strengthens
- Abs
- Arms
- Lower back
Benefits and precautions
Benefits
- Builds strong wrists, forearms, elbows and shoulders
- Trains the core and back muscles to hold the body level like a plank on two points
- Teaches whole-body tension and balance that carry over to other arm balances
- Presses firmly on the belly; traditional texts praise it for digestion (not proven by modern studies)
- Demands steady focus and calm breathing under effort
- Develops the forearm strength used in the calisthenics elbow lever
Avoid or modify if
- Pregnancy, and during your period if pressure on the belly feels uncomfortable
- Hernia, peptic ulcer, or recent abdominal or chest surgery
- High blood pressure or heart disease — the pose invites straining and breath holding
- Wrist, elbow or shoulder injury, including carpal tunnel syndrome
- Practise only on an empty stomach, at least three hours after a meal
Peacock pose (Mayurasana) is an advanced arm balance: your hands are on the floor with the fingers turned back, your elbows press into your belly, and your whole body hovers level above the mat like a peacock with its tail held out. It looks like a party trick, but it is really a strength drill for the wrists, forearms and core. This guide explains what the pose is, the strength you need before you try it, a step-by-step progression, the real benefits and who should avoid it.
What is peacock pose in yoga? The name explained
The peacock pose Sanskrit name is Mayurasana: mayura means "peacock" and asana means "pose" or "seat". So the Mayurasana meaning, and Mayurasana in English, is simply "peacock pose", and that is the yoga name used in most classes. The level body is the bird's long tail, and the head lifted in front is its neck and crest.
It is one of the older postures on record. The Hatha Yoga Pradipika, a 15th-century manual, describes it and praises it for the digestive fire. In Ashtanga yoga, Mayurasana appears in the Intermediate Series, next to Pincha Mayurasana. Unlike most arm balances, your hands point backwards and your elbows act as a shelf for the body, so the pose is a lever rather than a squat.
Prerequisites: are you ready for Mayurasana?
Be honest with yourself here — most wrist and elbow strains come from trying the full shape too early. You are ready to start the drills when you can:
- Hold plank pose for 60 seconds with a straight body.
- Lower slowly through Chaturanga Dandasana five times without your hips sagging.
- Kneel with your palms flat and fingers turned toward your knees, and lean some weight forward without wrist pain.
- Balance for a few breaths in crow pose — not essential, but it shows you can trust your hands.
Flexibility is not the limit in this pose. Wrist tolerance and a strong, braced middle are.
How to do peacock pose: cues that make it work
The steps above show how to do Mayurasana step by step. These tips fix the problems most people meet in the first weeks:
- Elbows together, high on the belly. Place them just above the navel, not on the ribs. If they slide apart, your body will sink between them.
- Lean more than you think. Your legs lift because your chest moves forward past your hands. Put a folded blanket in front of your face so leaning feels safe.
- Legs straight and squeezed. Loose legs are heavy. Press the thighs together and point the toes to make one long, light lever.
- Belly firm, not soft. Brace as if someone were about to press on your stomach. This protects the organs and gives the elbows something solid to push against.
- Breathe short and steady. If your face goes red, come down.
Peacock pose progression and variations for beginners
This yoga tutorial breaks the peacock into five stages, so beginners always have a variation they can do today. Stay at each stage for one or two weeks, practising two or three times a week:
- Wrist prep: on hands and knees, turn the fingers back and gently rock forward and back for a minute.
- Swan (Hamsasana): set up exactly as for peacock, but leave your toes on the floor. Lean until your hands carry most of your weight.
- Peacock pose with blocks: put your feet on a block and lift one leg, then the other. Hands on two blocks also give your face more room.
- Lotus peacock (Padma Mayurasana): with legs folded in lotus the lever is shorter and much easier to lift. Only try it if lotus is comfortable for your knees.
- Full pose: both legs straight back and lifted. A half peacock with slightly bent knees is a fine stepping stone.
Peacock pose benefits in yoga
So, what is peacock pose good for? The main peacock posture benefits are about strength. Holding your body level on bent arms loads the wrists, forearms and the front of the shoulders, while the whole trunk works to stay stiff. Advanced practitioners use it to build the control needed for other arm balances and hand balances.
Traditional Mayurasana benefits focus on digestion: the elbows press deeply into the abdomen, and old texts claim this "destroys" digestive complaints. Some books also recommend Mayurasana for diabetes. There is no good research behind either claim, and the belly pressure makes the pose unsuitable for many people with digestive problems. If blood sugar is your concern, our yoga for diabetes plan uses gentler, better-studied poses.
Is it a yoga pose for back pain? No. Which asana is best for back pain depends on the cause, but a demanding lever that invites breath holding is not the place to start. If you want yoga poses for lower back pain or low back pain relief, including chair yoga poses, start with our yoga for back pain plan.
Muscles worked in Mayurasana
| Strengthens | Stretches or loads |
|---|---|
| Wrist and finger flexors, forearm muscles | Wrists in deep extension (bent back) |
| Triceps, biceps and front of the shoulders | Palms and inner forearms |
| Abdominal wall, obliques and deep core | Belly compressed by the elbows |
| Erector spinae, glutes and hamstrings | — |
Peacock pose vs elbow lever
People who train peacock pose calisthenics-style usually call it the elbow lever. The shape is almost the same. In the calisthenics version the hands often point sideways and the elbows sit on the sides of the hips, which is easier to balance. The yoga version keeps the fingers pointing back and the elbows close together under the belly, so it demands more wrist flexibility and more core bracing.
Yoga variations: feathered peacock and friends
The feathered peacock pose is a different posture. Pincha means "feather", so Pincha Mayurasana is the "peacock feather pose" — an inversion on the forearms, also called forearm stand. Pincha Mayurasana prep poses such as dolphin, and Pincha Mayurasana benefits for the shoulders, are covered on that page; the feathered peacock pose in yoga shares only the name with this one.
Other advanced peacock pose variations include one-handed peacock and peacock with the legs in a split. They are for people who can already hold the full pose calmly for 10 seconds.
Who should avoid peacock pose
Skip Mayurasana if you have any condition in the caution box above. The strong pressure on the belly rules it out in pregnancy, with a hernia or ulcer, after abdominal surgery and — by choice — during a period. Because it tempts you to hold your breath and push, it is not suitable with high blood pressure or heart disease. Stop at once if you feel sharp pain in the wrist, elbow or belly.
It is also not a good peacock yoga pose for kids: growing wrists do not need this load. Children enjoy animal poses in our yoga for kids guide instead.
A short peacock pose yoga sequence
Warm up for 10 minutes: wrist circles, cat and cow, three rounds of Surya Namaskar, plank and chaturanga. Then practise your progression stage three to five times, resting between tries. Finish with child's pose, a gentle downward dog and wrist stretches with the fingers pointing forward. You can save this as your own sequence in the session builder and let the voice guide time it.
Frequently asked questions
What is Mayurasana in English?
Mayurasana means peacock pose. "Mayura" is Sanskrit for peacock and "asana" means pose; the level body looks like a peacock's tail.
Is peacock pose good for beginners?
Not as a full pose. Beginners can start with wrist prep, plank and swan pose (toes on the floor), then add blocks. Most people need several weeks to months of practice.
How long should I hold peacock pose?
Start with 2–3 breaths, about 10 seconds. Quality matters more than time: come down as soon as you start holding your breath or your body sags.
Why do my feet not lift in Mayurasana?
Two peacock tips solve most cases: lean further and firm your legs. Usually you are not leaning far enough forward or your legs are loose. Move your elbows higher on the belly, squeeze your legs together and shift your chest forward over your hands.
Does peacock pose help with diabetes or digestion?
Traditional texts praise it for digestion, and some books suggest it for diabetes, but there is no reliable evidence. Keep your prescribed treatment and ask your doctor before trying strong abdominal poses.
How is Mayurasana different from feathered peacock pose?
Mayurasana is a level arm balance on the hands. Feathered peacock (Pincha Mayurasana) is a forearm stand, an upside-down inversion.
Who should not do peacock pose?
Avoid it in pregnancy, with a hernia, ulcer, high blood pressure, heart disease, recent surgery, or wrist and elbow injuries. Skip it after meals and during your period if it feels uncomfortable.
This page is for general education. Check with your doctor before starting yoga if you are pregnant, have a medical condition or an injury. Stop if you feel pain, dizziness or shortness of breath.